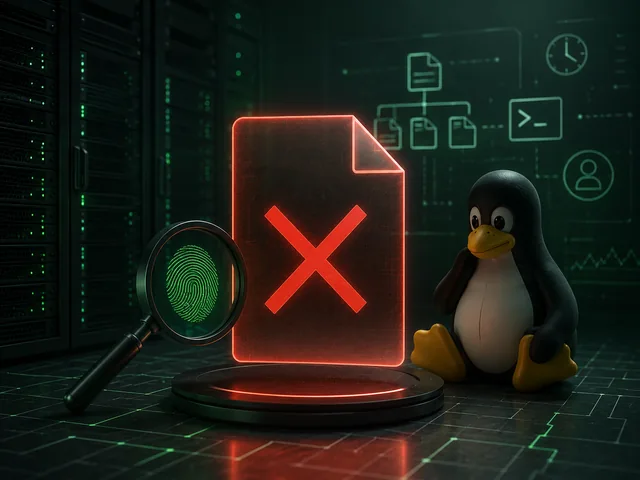
Many website owners breathe a sigh of relief as soon as they enable Cloudflare. Features such as traffic filtering, DDoS protection, and edge caching make any project’s infrastructure more resilient. However, there is one subtle caveat: Cloudflare hides the real IP addresses of your website’s visitors, including malicious actors. As a result, since your server only sees Cloudflare’s IP addresses, tools like Fail2ban cannot block specific clients based on their IP addresses.
Imagine that your WordPress site is under brute-force attacks on the /wp-login.php page. Cloudflare proxies all these requests, but your backend server sees only a few IP addresses belonging to Cloudflare nodes that are making dozens of requests. And if Fail2ban blocks them in this scenario, it accidentally blocks all legitimate traffic as well. It’s like closing an entire subway station just because a single pickpocket got in - not exactly the smartest strategy :)
This raises a legitimate question: How can we make Fail2ban useful again when the site is behind Cloudflare? That’s what we’ll discuss in this article.
How Fail2ban works with and without CloudFlare
Fail2ban is a monitoring mechanism that checks your server logs and looks for suspicious user behavior patterns, such as failed SSH login attempts, an excessive number of requests to a particular page, and recurring errors in Nginx access logs. If the number of such violations from a given IP address exceeds a certain threshold, Fail2ban adds the offending IP address to the firewall rules on your server.
For example, if someone makes 20 failed SSH login attempts to your server within one minute, Fail2ban inserts a rule into iptables to block connections from that IP address.
However, if you use CloudFlare, the server cannot see the visitor’s real IP address, only its “mask” in the form of CloudFlare’s own IP address. That is, every request to your server comes from CloudFlare’s infrastructure. Instead of the attacker’s computer (203.0.113.45), you see the CloudFlare data center (172.71.150.2) in the logs.
If Fail2ban blocks this address, it will block CloudFlare itself, cutting off thousands of innocent users along with the attacker.
The solution is to configure your web server and Fail2ban to identify the client’s real IP address and block it. This is where HTTP headers and a bit of configuration magic come into play.
Configuring the Web Server to Determine the Real IP Address
In this example, we’ll provide all the settings for the Nginx web server, but if you’re using a different web server, such as Apache, you can easily implement similar functionality there as well.
So, CloudFlare adds an X-Forwarded-For or CF-Connecting-IP header to every request it proxies to your server. This header contains the client’s actual IP address, which you can see by configuring your web server to trust this header.
Example Nginx Configuration
In Nginx, you will need the real_ip module. To enable it, create a file, for example /etc/nginx/conf.d/cloudflare_realip.conf, and add the following configuration to it:
real_ip_header CF-Connecting-IP;

set_real_ip_from 173.245.48.0/20;
set_real_ip_from 103.21.244.0/22;
set_real_ip_from 103.22.200.0/22;
set_real_ip_from 103.31.4.0/22;
set_real_ip_from 141.101.64.0/18;
set_real_ip_from 108.162.192.0/18;
set_real_ip_from 190.93.240.0/20;
set_real_ip_from 188.114.96.0/20;
set_real_ip_from 197.234.240.0/22;
set_real_ip_from 198.41.128.0/17;
set_real_ip_from 162.158.0.0/15;
set_real_ip_from 104.16.0.0/13;
set_real_ip_from 104.24.0.0/14;
set_real_ip_from 172.64.0.0/13;
set_real_ip_from 131.0.72.0/22;

set_real_ip_from 2400:cb00::/32;
set_real_ip_from 2606:4700::/32;
set_real_ip_from 2803:f800::/32;
set_real_ip_from 2405:b500::/32;
set_real_ip_from 2405:8100::/32;
set_real_ip_from 2a06:98c0::/29;
set_real_ip_from 2c0f:f248::/32;

real_ip_recursive on;
As you can see, we have listed all of Cloudflare’s public IPv4 and IPv6 addresses in the file. Now, when your server detects that a request has come from one of these IP addresses, it will check the X-Forwarded-For header to retrieve the visitor’s actual IP address. This way, the visitor’s real IP address will appear in the web server logs. For accuracy, always use the complete list of CloudFlare subnets, available on the documentation page.
And here, it would seem, you could simply block these addresses in case of policy violations. But if it were that simple, we wouldn’t be writing this article. Let’s discuss in a bit more detail how Cloudflare works.
How Cloudflare works under the hood
When you configure your web server to retrieve visitors’ real IP addresses from the X-Forwarded-For headers, the web server reads these headers and logs these real IP addresses for each request. But the traffic itself actually continues to arrive at your server under the same Cloudflare IP addresses.
Imagine that you received an email from Charlize Theron, opened it, and the text of the email itself says “sent by Jim Carrey.” Yes, you now know that the email was forwarded and that Jim is the actual sender, but you received it from Charlize, using her email address. And if you block Jim’s address, you’ll still keep getting funny emails from Charlize’s address :)
Sorry for such a vivid example, but I think you get the gist of it.
So what should you do in this case?
The answer here is obvious: you need to block the sender’s real IP address on the Cloudflare side so that they don’t even try to proxy requests from that user to your server.
You might ask, how do you do that?
It turns out to be fairly simple, though it does require a bit of work. But the mechanism exists, and it works quite well. To do this, we’ll need to integrate your usual Fail2ban with Cloudflare’s API.
Cloudflare Configuration
When you get to the idea of moving the blocking to the Cloudflare side, a logical question arises: how exactly do you block? In Cloudflare, there are at least two options for this:
The first is the so-called IP Access Rules. Essentially, these are simple rules of the form “block this IP.” They are created one at a time, manually or via the API, and operate at the account or zone level.
At first glance, this seems like exactly what you need. Fail2ban detects an intruder and then creates a rule that blocks them by IP address. But in practice, this approach quickly becomes cumbersome.
Imagine a typical scenario where bots start scanning your site, causing Fail2ban to catch several hundred or thousands of addresses in a single day. If you create a separate rule for each one, you’ll have thousands of entries in Cloudflare within a week. The interface, in this case, turns into a mess; managing it becomes cumbersome and difficult, and any bulk operations - such as a simple cleanup - become a real headache.
Furthermore, this method scales quite poorly, since Fail2ban is an automated tool and can add tens or hundreds of IPs per hour. And the “one rule per IP” model simply isn’t designed for such scenarios.
That’s precisely why the much better approach is to use Custom Lists in combination with a single WAF rule (Web Application Firewall).
The idea here is very simple. You create a single list of IP addresses, for example fail2ban-blocklist, and then create just one rule in the WAF that says:
if the client’s IP is on this list, block the request from it.
As a result, you have just one list in the interface where IPs are added, and a single rule that references it. And Fail2ban simply manages the contents of this list. This approach offers several practical advantages right away.
First, it simply looks cleaner. You don’t have thousands of scattered rules; they’re replaced by a single neat list.
Second, it’s easy to manage. You can view the entire list, export it, clean it up, or filter it, rather than digging through a long stream of rules.
Third, this method scales easily, since adding a new IP is simply an entry in the list, not creating a new object in the rule system.
And finally, Cloudflare itself recommends using its WAF, and they know best :)
How this works in practice
Once you understand the general idea, the configuration itself turns out to be quite straightforward. But it’s important to do it carefully, just like any other task, so you don’t run into side effects later.
It all starts with creating an API token, through which Fail2ban will communicate with Cloudflare.
In the Cloudflare dashboard, go to your profile, the API Tokens section, and create a new token. For security reasons, it’s best not to grant it too many permissions, so we’ll only specify the bare essentials:
- access to WAF management (Firewall Services);
- access to Lists.
This token will reside on the server, and it’s best not to make it all-powerful, just in case.
Next, create the list itself.
In the Cloudflare interface, this is done under WAF → Tools → Lists. You need to create a new list of IP addresses and give it a descriptive name, for example:
fail2ban-blocklist
At this stage, the list is still empty, and that’s perfectly normal, since Fail2ban will populate it once we configure it.
Next, we create the key element of our entire setup - the WAF rule. This rule is as simple as possible in its logic:
ip.src in $fail2ban-blocklist
The Action: Block field
In other words, it states that if the source IP of the request is in our list, then apply the Block action to it.
It is this rule that ties everything together, and without it, the list does nothing on its own.
That’s it - the Cloudflare configuration is complete, and we can move on to configuring Fail2ban.
Configuring Fail2ban
After we’ve moved the blocking point to Cloudflare, Fail2ban itself doesn’t disappear; it remains the central element of the entire setup. Its role just changes slightly. Now it doesn’t block traffic directly, but only determines who the intruder is, and then passes that decision on to Cloudflare.
Let’s get started.
Basic jail configuration
Importantly, nothing fundamentally new appears here. We still define the following:
- what we consider a violation;
- how many attempts we allow;
- over what period;
- and for how long the ban should last.
For example, protection for the standard WordPress login page might look something like this:
[wordpress-login]
enabled = true
port = http,https
filter = wordpress-login
logpath = /var/log/nginx/access.log
maxretry = 5
findtime = 600
bantime = 3600
ignoreip = 127.0.0.1/8 YOUR_IP YOUR_SUBNET
Here we have specified that if there were more than 5 failed login attempts within 10 minutes, we consider the IP address suspicious. So, at this stage, we have taught Fail2ban to detect attackers.
IMPORTANT! In the last line, we specified the ignoreip parameter, which we strongly recommend you use to avoid accidentally blocking yourself.
Configuring the action
This is where the difference from the classic setup begins. Recall that by default, Fail2ban adds a blocking rule to iptables when banning an IP. But in our architecture, this is pointless, and we’ve already explained why above.
Therefore, we’re replacing the standard action with our own, which will work via the Cloudflare API.
The easiest way is to create a separate action file, for example /etc/fail2ban/action.d/cloudflare.conf, inside which we’ll describe what to do when blocking and unblocking a user. Accordingly, when blocking, we add the IP to the Cloudflare list, and when unblocking, we remove the IP from that list.
The simplest example might look like this:
[Definition]

# API
_cf_account_id = {{ YOUR ACCOUNT ID }}
_cf_list_id = {{ YOUR WAF LIST ID }}
_cf_api_prms = -H "Authorization: Bearer {{ YOUR TOKEN }}" -H "Content-Type: application/json"

# Actions
actionstart =
actionstop =
actioncheck =

# BAN → Add IP to list
actionban = curl -s -X POST "https://api.cloudflare.com/client/v4/accounts/<_cf_account_id>/rules/lists/<_cf_list_id>/items" \
  <_cf_api_prms> \
  --data '[{"ip":"<ip>","comment":"fail2ban"}]'

# UNBAN → Delete IP from list
actionunban = ITEM_ID=$(curl -s -X GET "https://api.cloudflare.com/client/v4/accounts/<_cf_account_id>/rules/lists/<_cf_list_id>/items" \
  <_cf_api_prms> | jq -r '.result[] | select(.ip=="<ip>") | .id'); \
  [ -n "$ITEM_ID" ] && curl -s -X DELETE "https://api.cloudflare.com/client/v4/accounts/<_cf_account_id>/rules/lists/<_cf_list_id>/items" \
  <_cf_api_prms> \
  --data "{\"items\":[{\"id\":\"$ITEM_ID\"}]}"
This is the bare-bones version, but it’s more than enough to understand the mechanics and start blocking unwanted connections.
In practice, such actions are often refined, for example by adding checks for successful API responses, error logging, etc. But the essence remains the same - Fail2ban becomes a Cloudflare API client.
Connecting the action
Remember the jail we created above? Well, after the action is defined, it needs to be connected to our jail. This is done with a single line:
action = cloudflare
So our jail now looks like this:
[wordpress-login]
enabled = true
port = http,https
filter = wordpress-login
logpath = /var/log/nginx/access.log
maxretry = 5
findtime = 600
bantime = 3600
ignoreip = 127.0.0.1/8 YOUR_IP YOUR_SUBNET
action = cloudflare
Restart Fail2ban using the command
systemctl restart fail2ban
and from this point on, Fail2ban stops interacting with the local firewall and starts working through Cloudflare.
Verifying the setup
As with any task, you need to verify that everything is working.
First, let’s test the forced block. Enter the following command in the server console:
fail2ban-client set wordpress-login banip 1.2.3.4
After that, you need to verify three things:
- IP 1.2.3.4 has appeared in the custom list in Cloudflare;
- the WAF rule is actually blocking it;
- requests from this IP are no longer reaching the server (yes, yes, you can substitute any test IP)
Then, be sure to test the unblocking:
fail2ban-client set wordpress-login unbanip 1.2.3.4
And verify that the IP has been removed from the list and access has been restored.
Only after this can you be sure that the setup actually works.
Important!
And one last thing to note to avoid confusion: This entire setup is specifically for HTTP/HTTPS traffic that goes through Cloudflare.
For other services, such as SSH, nothing changes. After all, in their case:
- the connection goes directly to your server’s IP address;
- Fail2ban operates as usual, via iptables;
- blocking occurs locally on your server.
Therefore, there’s no need to try to “force Cloudflare” onto everything.
Let’s summarize how this works
Once all the settings have been configured and the Fail2ban service has been restarted, our setup begins to function fully. Let’s briefly summarize it again:
- Fail2ban detects an intruder in your web server’s logs;
- instead of adding a rule to the local iptables, it makes an HTTP request to the Cloudflare API;
- it adds the intruder’s IP to the
fail2ban-blocklist; - Cloudflare immediately begins blocking that IP.
When unblocking, the same process occurs, but in reverse.
SEO and the Future of Digital Business
From a business perspective, failing to protect your site from brute-force attacks isn’t just about increasing the load on your server’s CPU. Constant attempts generate errors, bloat logs, and can slow down caching layers.
Server response time is critical for SEO, as Googlebot won’t wait forever and may simply stop crawling your site. Furthermore, if the server is overloaded with malicious requests and your site’s pages load slowly and with delays, your site may even be penalized in search results for failing PageSpeed Insights tests.
For example, the owner of an online store noticed that bots were attacking /wp-login.php hundreds of times per minute. Pages began loading slowly, and customers were abandoning their carts. After configuring Fail2ban using Cloudflare headers, the server load normalized, and the conversion rate recovered.
In this case, security directly impacts sales.
FAQ
Why doesn’t Fail2ban block the IP, even though everything looks correct in the logs? Because the log and the network are different layers. After configuring real IP, Nginx shows the client’s actual address, but the connection to the server still comes from Cloudflare. Fail2ban passes the IP to the firewall, but the firewall simply doesn’t recognize that source. As a result, the ban is in place, but it doesn’t affect the traffic.
Is it still possible to use iptables alongside Cloudflare? Yes, but not for HTTP/HTTPS. The local firewall remains relevant for SSH and other services that connect directly. Just don’t expect it to block clients coming through Cloudflare.
Why do you even need Fail2ban if you have Cloudflare WAF? Cloudflare doesn’t know the context of your application. It doesn’t understand what constitutes suspicious behavior for you, such as password brute-forcing in the admin panel. Fail2ban does exactly that, and Cloudflare already applies the block.
Why can’t you just create IP Access Rules instead of lists? You can, but it quickly turns into chaos. During an active attack, hundreds of rules will appear, which are cumbersome to manage. A list and a single rule provide the same functionality, but without the clutter.
What happens if you accidentally block your own IP? You’ll simply be unable to access the site because the block occurs on the Cloudflare side. That’s why it’s better to add your IPs to the exceptions right away, so you don’t run into such situations at the worst possible moment.
How safe is it to use a Cloudflare API token on a server? It’s fine as long as you grant it only the necessary permissions and don’t store it just anywhere. Essentially, this is access to blocking management, so you need to handle it carefully and reissue it at the slightest doubt.
Does this work only for WordPress or for any website? This is a universal approach. WordPress is just a convenient example, but the scheme works for any website that has HTTP request logs and allows you to define what constitutes suspicious behavior.
Conclusions
When you start configuring Fail2ban behind Cloudflare, it seems that simply “restoring” the real IPs to the logs is enough, and everything will work as before. Formally, this is true; the attacker detection starts working correctly. But in practice, this isn’t enough, because the very point where the block needs to be applied has changed.
The main lesson learned from real-world experience is that in a reverse proxy architecture, you cannot blindly carry over old approaches. If traffic passes through Cloudflare, then it must be managed there as well. Attempting to block clients locally via iptables in this case provides only the illusion of protection.
The correct approach turns out to be quite simple and logical: Fail2ban remains the tool for analysis and decision-making, while Cloudflare is the place where that decision is implemented. As soon as you separate these roles, all the strange effects - such as the block being in place while the attack continues - disappear immediately.
The result is not a workaround, but a more mature architecture where the outer layer filters incoming traffic, and the inner layer understands behavior and context. And it is precisely in this combination that the system begins to operate stably, predictably, and without unpleasant surprises.
We would also like to express our deep gratitude to our reader who provided helpful feedback that allowed us to revise this article. We think he’ll recognize himself :) Thank you!